How to send a custom email
Start with a workflow
Click 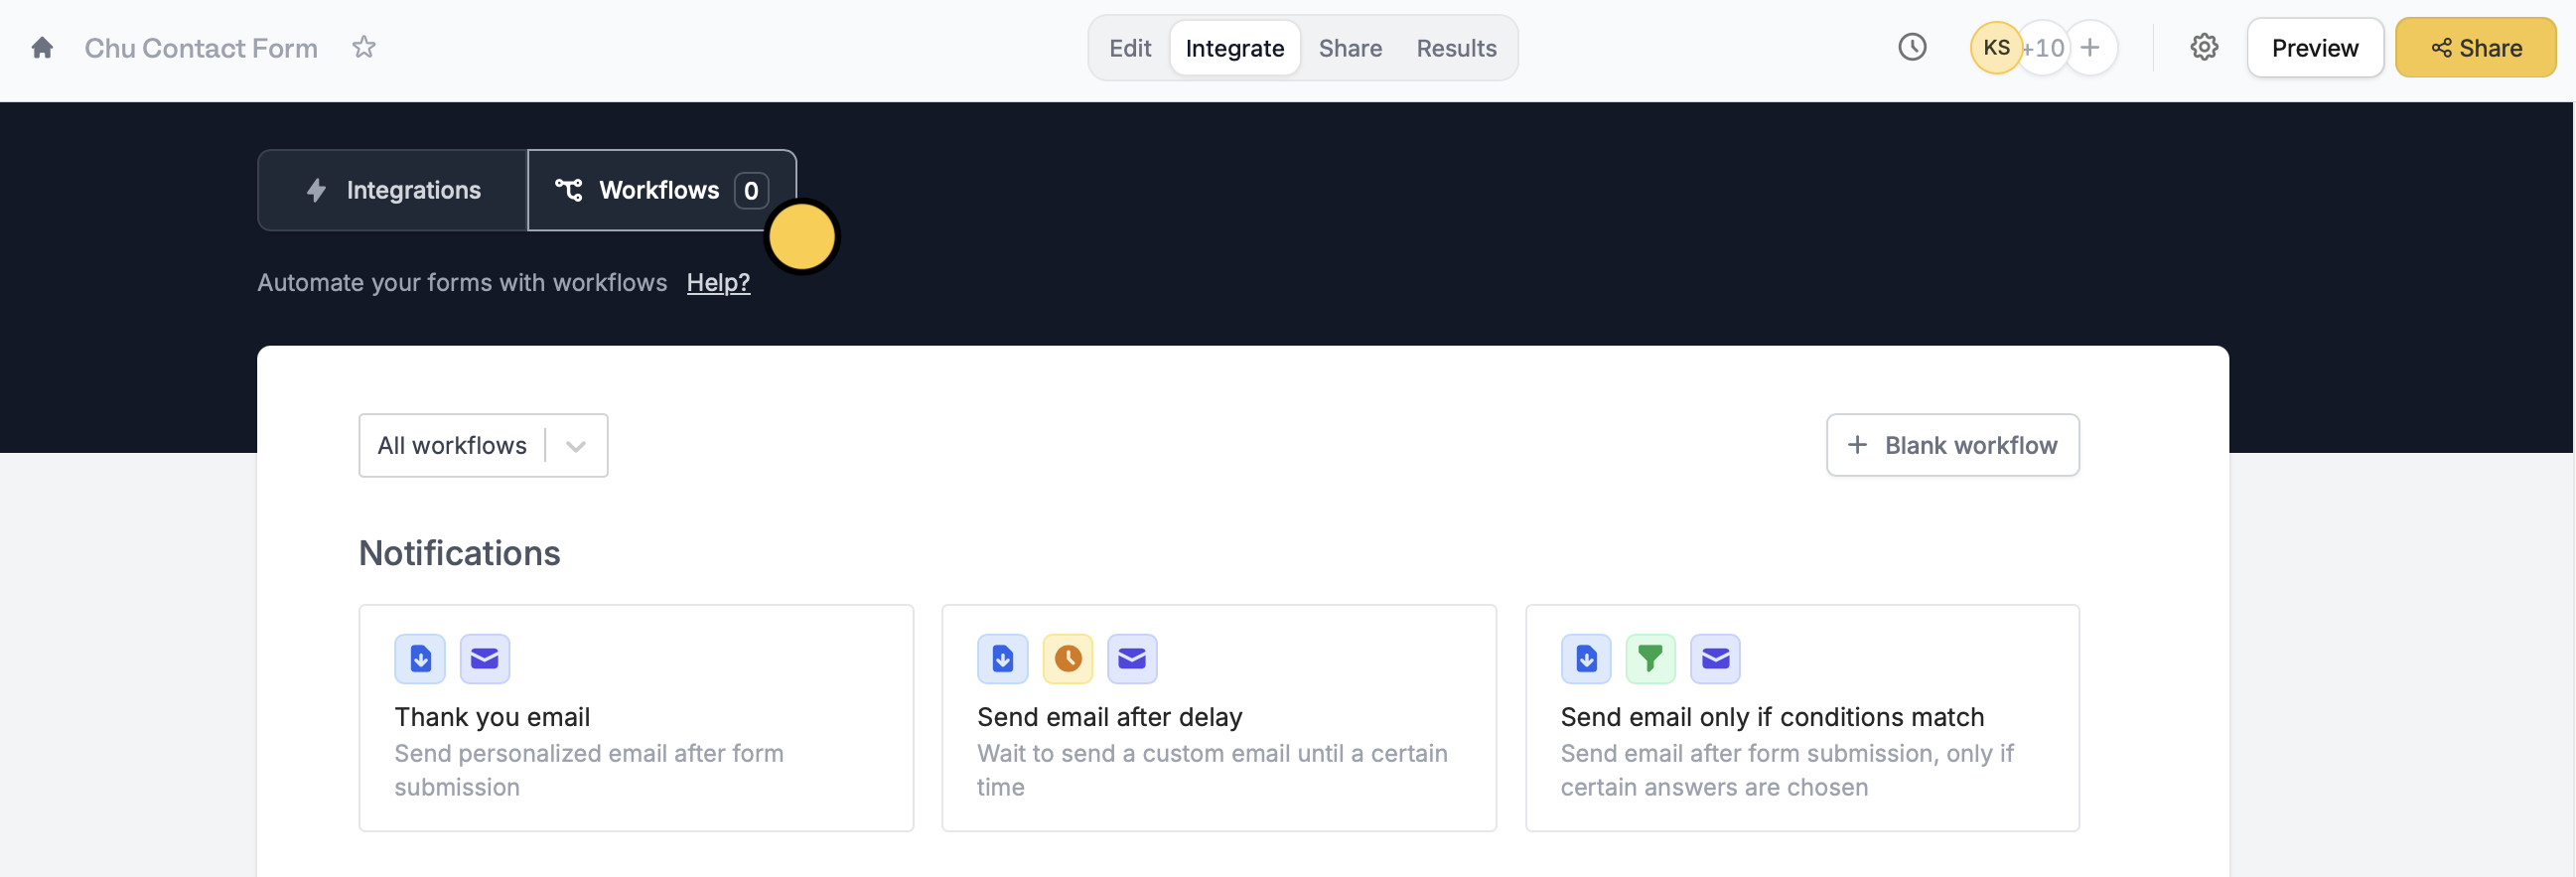
Integrate on the top menu of your form, followed by Workflows. Then, choose a template under Notifications. Alternatively, you may open a form’s Settings page followed by Custom emails.Edit your email
Then, 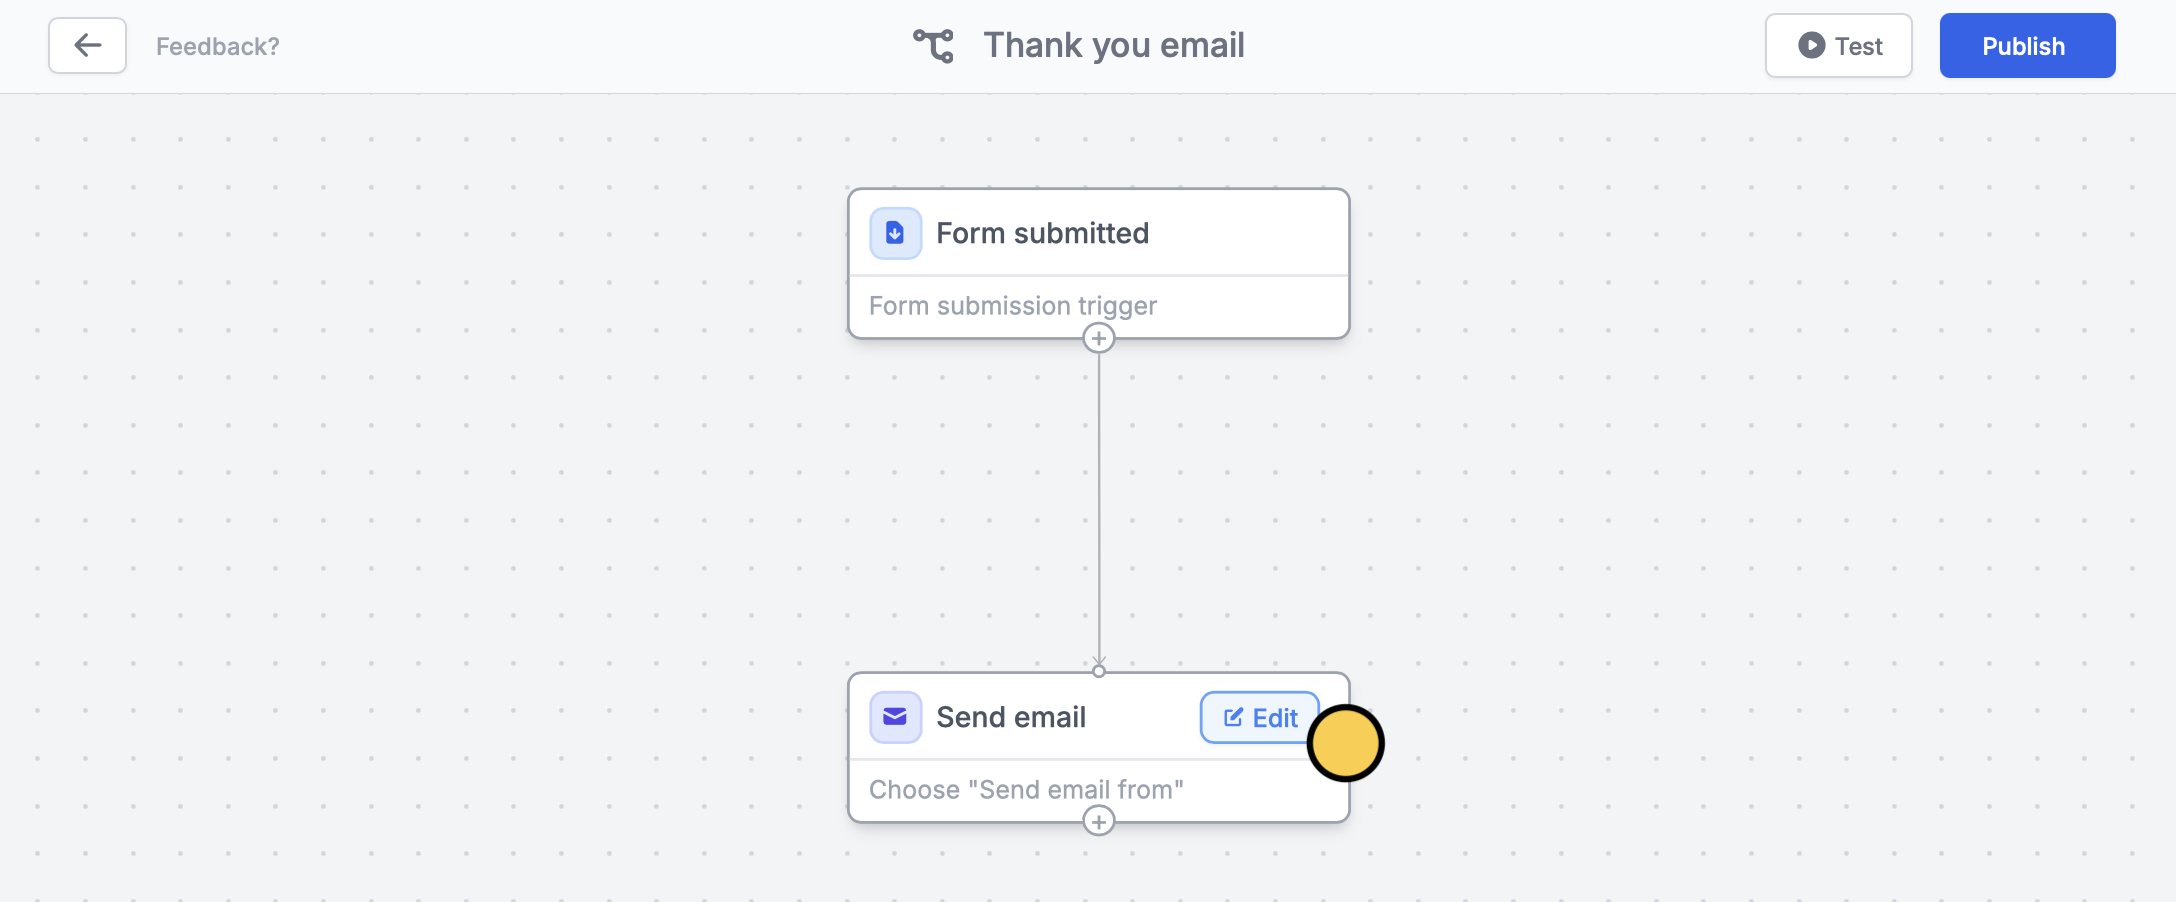

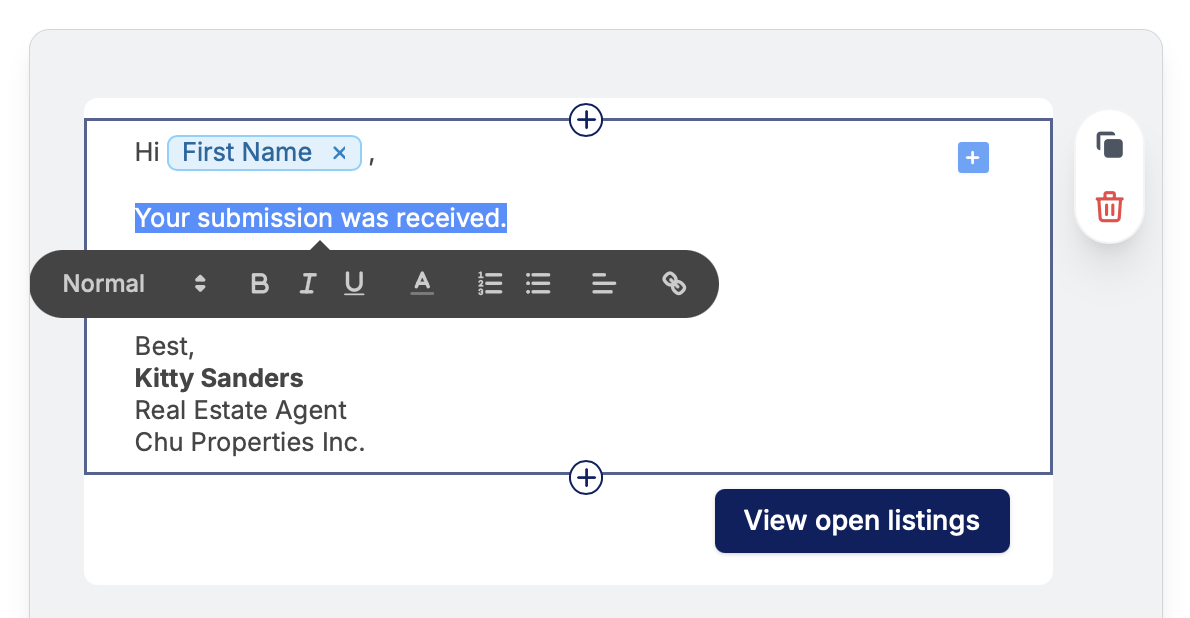
Edit the contents of your emailReference answers (optional)
You can also pipe answers, like First Name, by typing @ or clicking and choosing the corresponding field or question.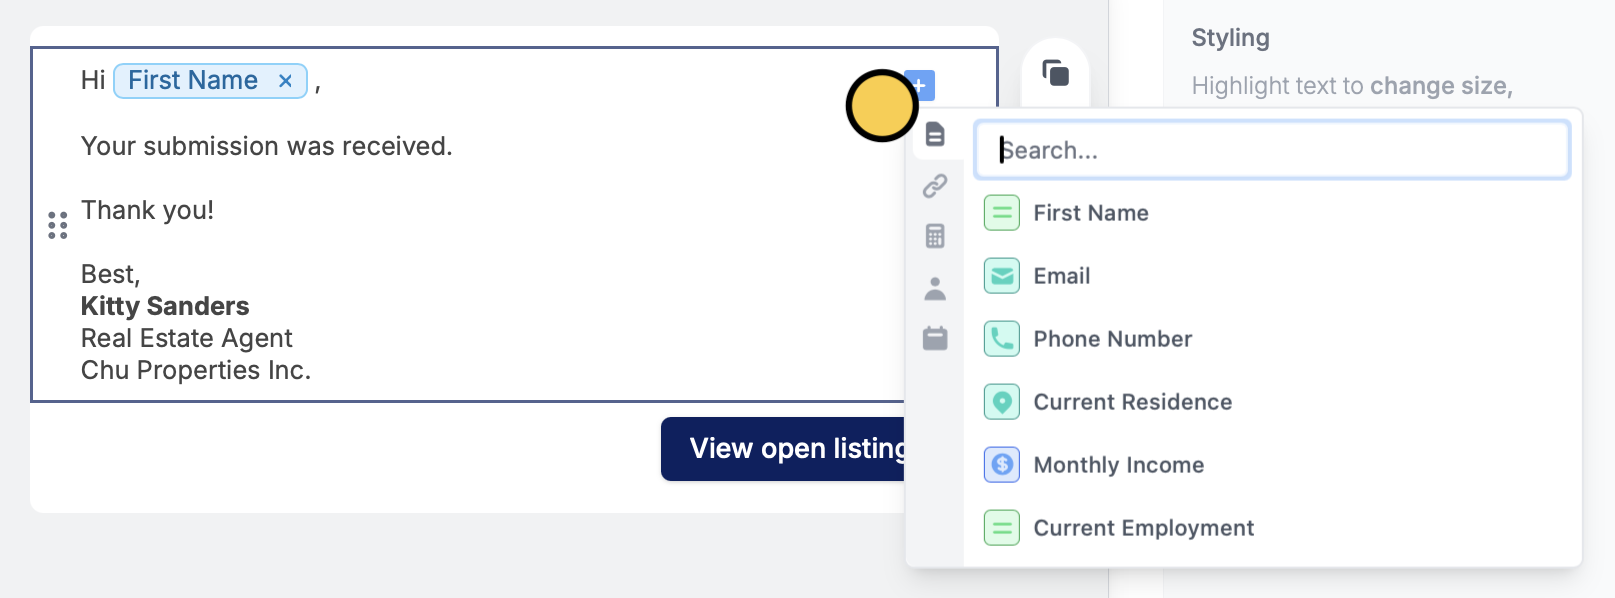
Test your email workflow before clicking Publish on the upper right corner.Send different messages based on responses
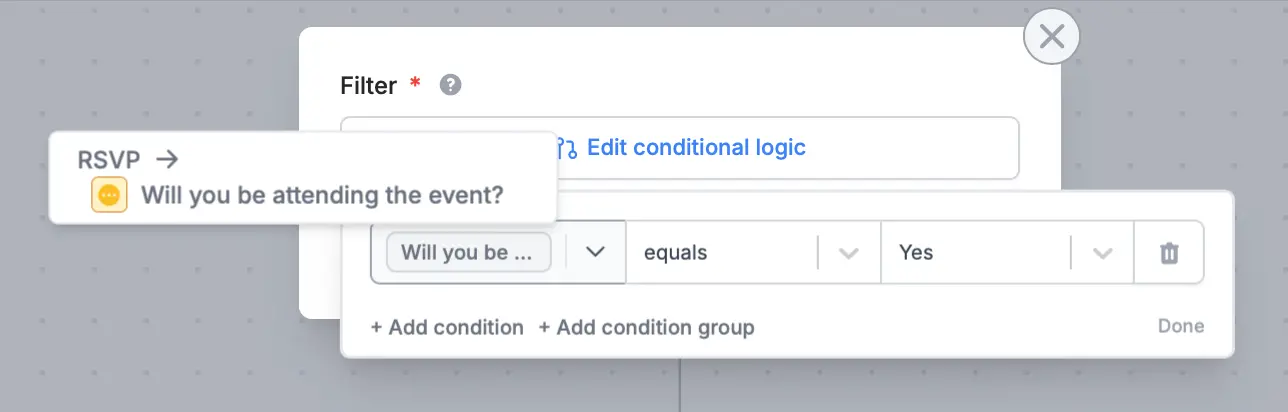
You can send a different message to a group of respondents depending on their answers. Choose Send email only if conditions match.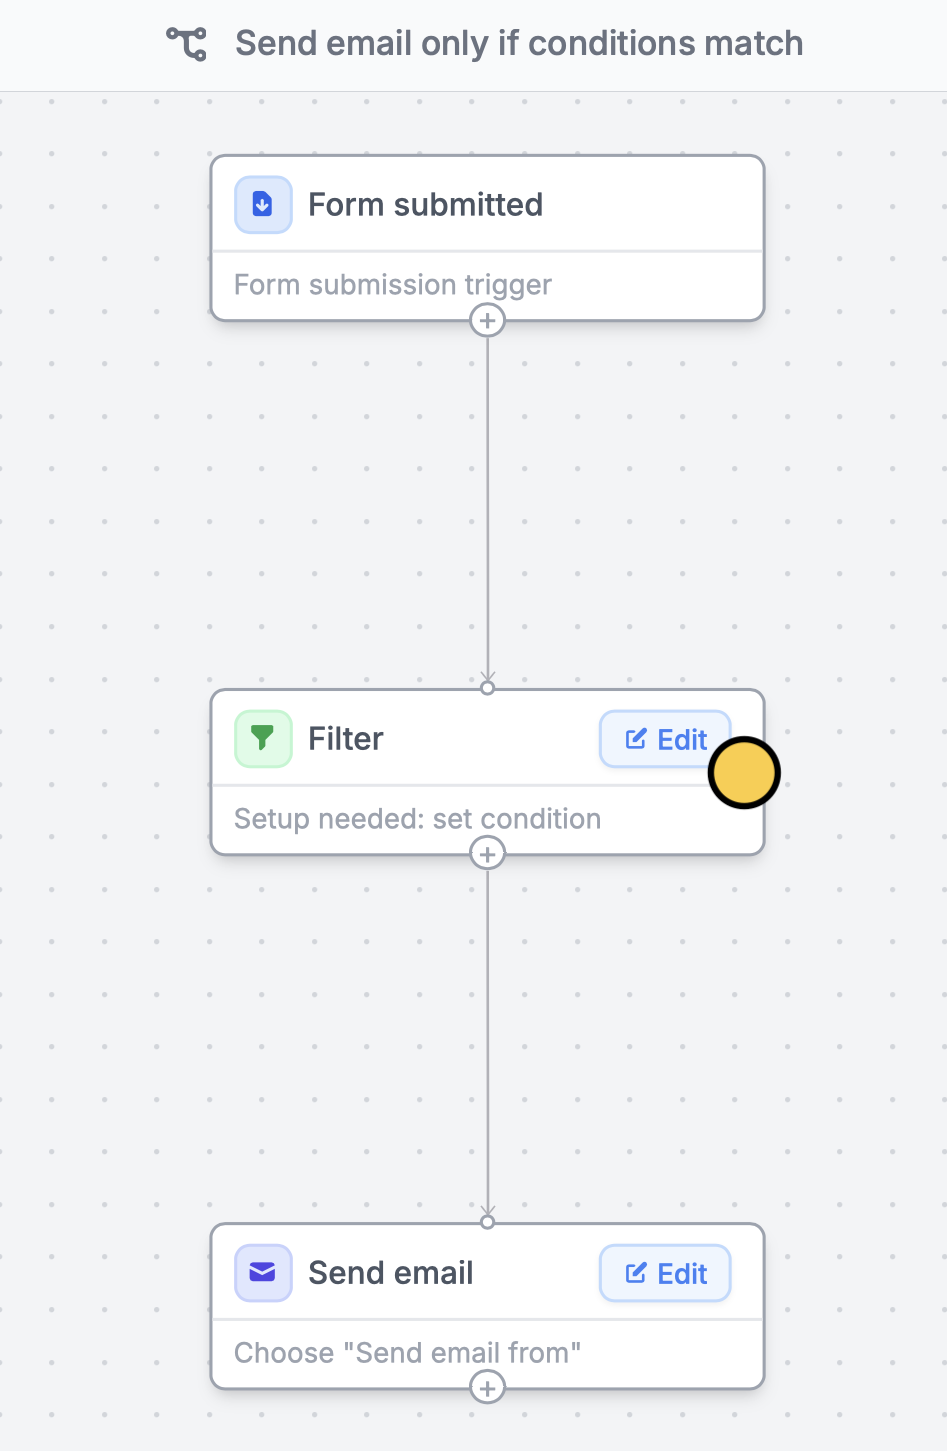
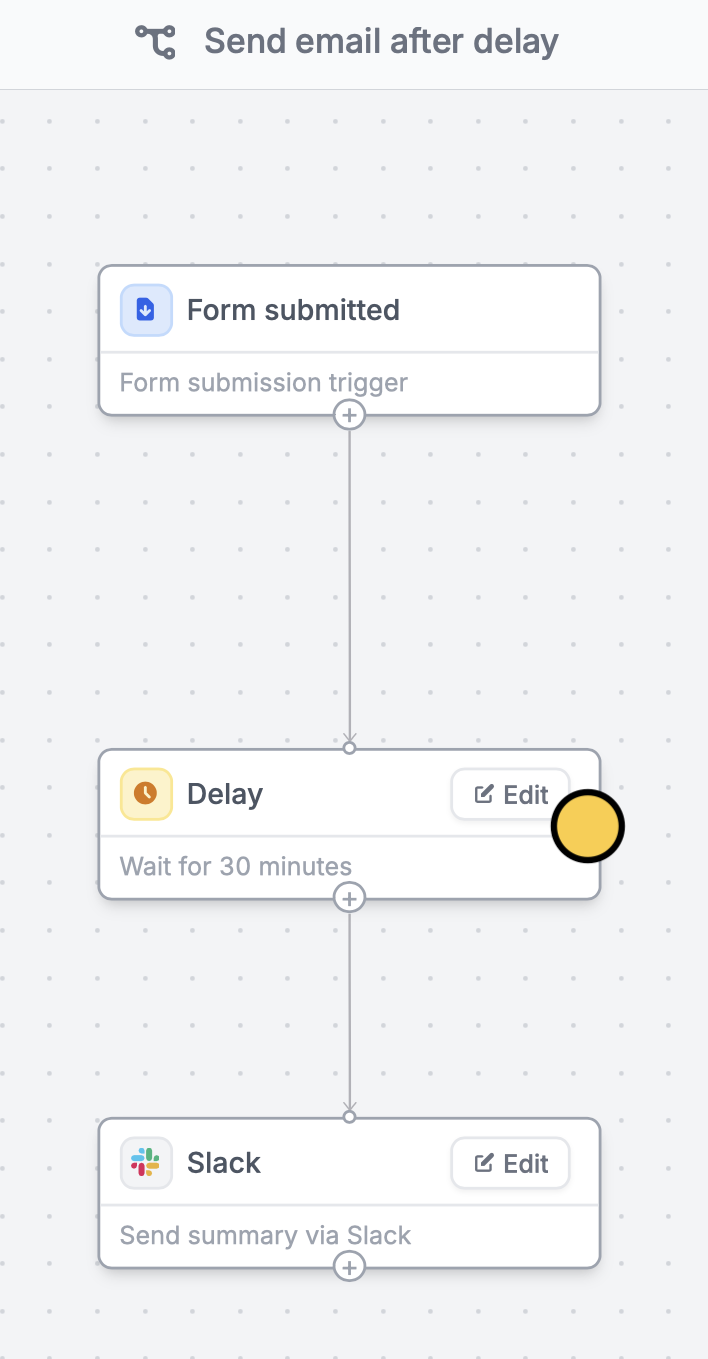
Send emails after a specified duration
You can opt to Send email after delay andEdit how later you want to send it in minutes, hours, or days.
Style your email
To customize the look of your message, go toEmail. Select your preferred Style and Theme. Click to add more elements.
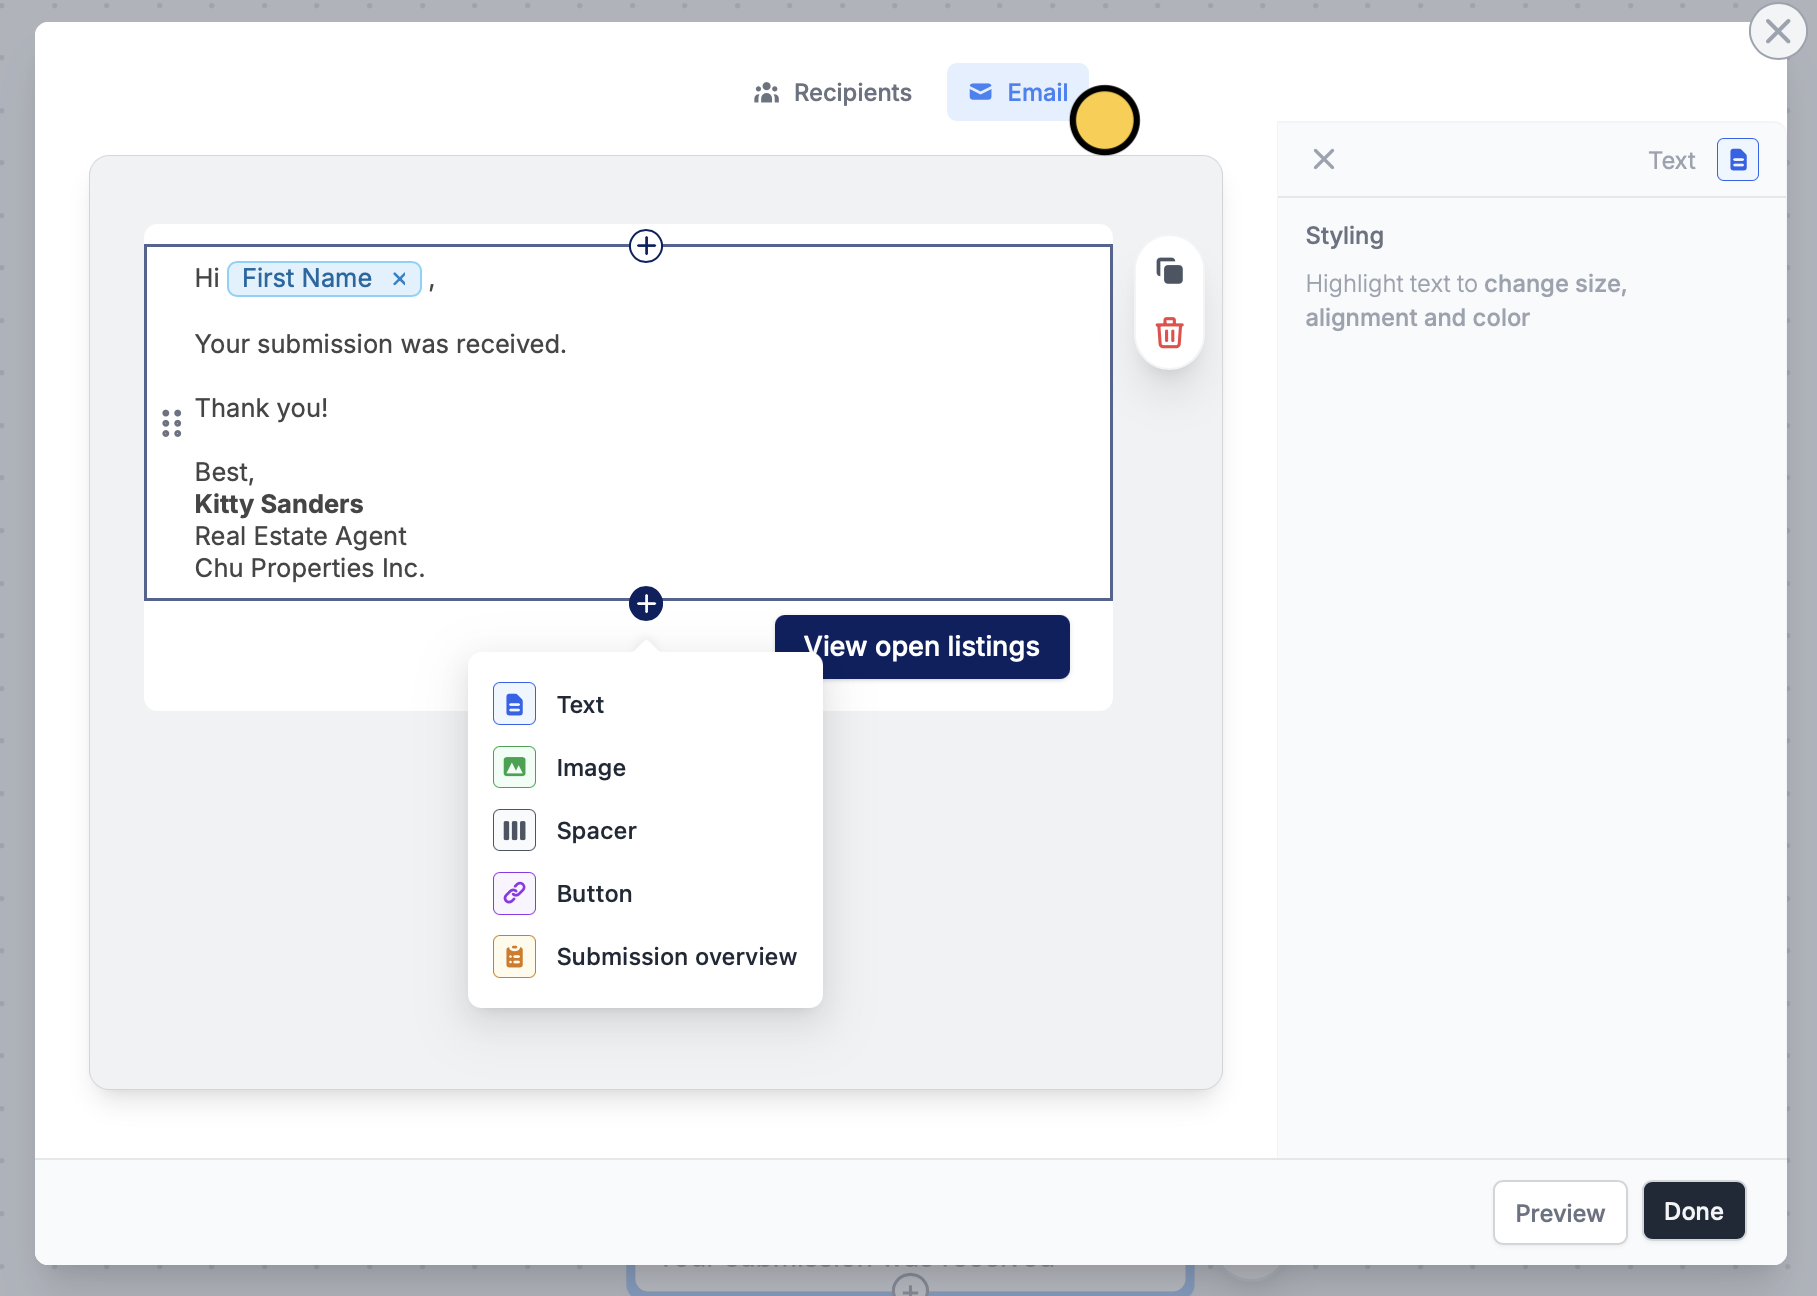
Add a submission overview
Here’s a quick way to show your respondents a summary of their form submission.Related articles
Answer piping
Insert previous answers into upcoming questions or fields.
Delay ("wait 4 hours")
Pause workflows for minutes, hours, or days.
Use SMTP
Send emails using your SMTP server to ensure reliable delivery.